

I hope everyone is enjoying a long holiday weekend! In case you have a little extra time on your hands and need a simple jewelry project to keep you busy, I wanted to offer my third tutorial: wire-wrapping a briolette and making a pair of earrings!
To begin, you will need these
basic tools and supplies: round nose pliers, flat nose pliers, wire
cutters,

26 gauge wire, fleur de lis
connectors (available at The Paris Carousel), briolette stones (I've
used London blue quartz), and a pair of ear wires (please see my
Tutorial 201 for how to oxidize sterling silver).

First, cut a piece of wire approximately
1-1/2 inches long and slide it through the hole of the briolette.
There should be about 1/3 of the wire on one side of the briolette,
and 2/3 on the other.

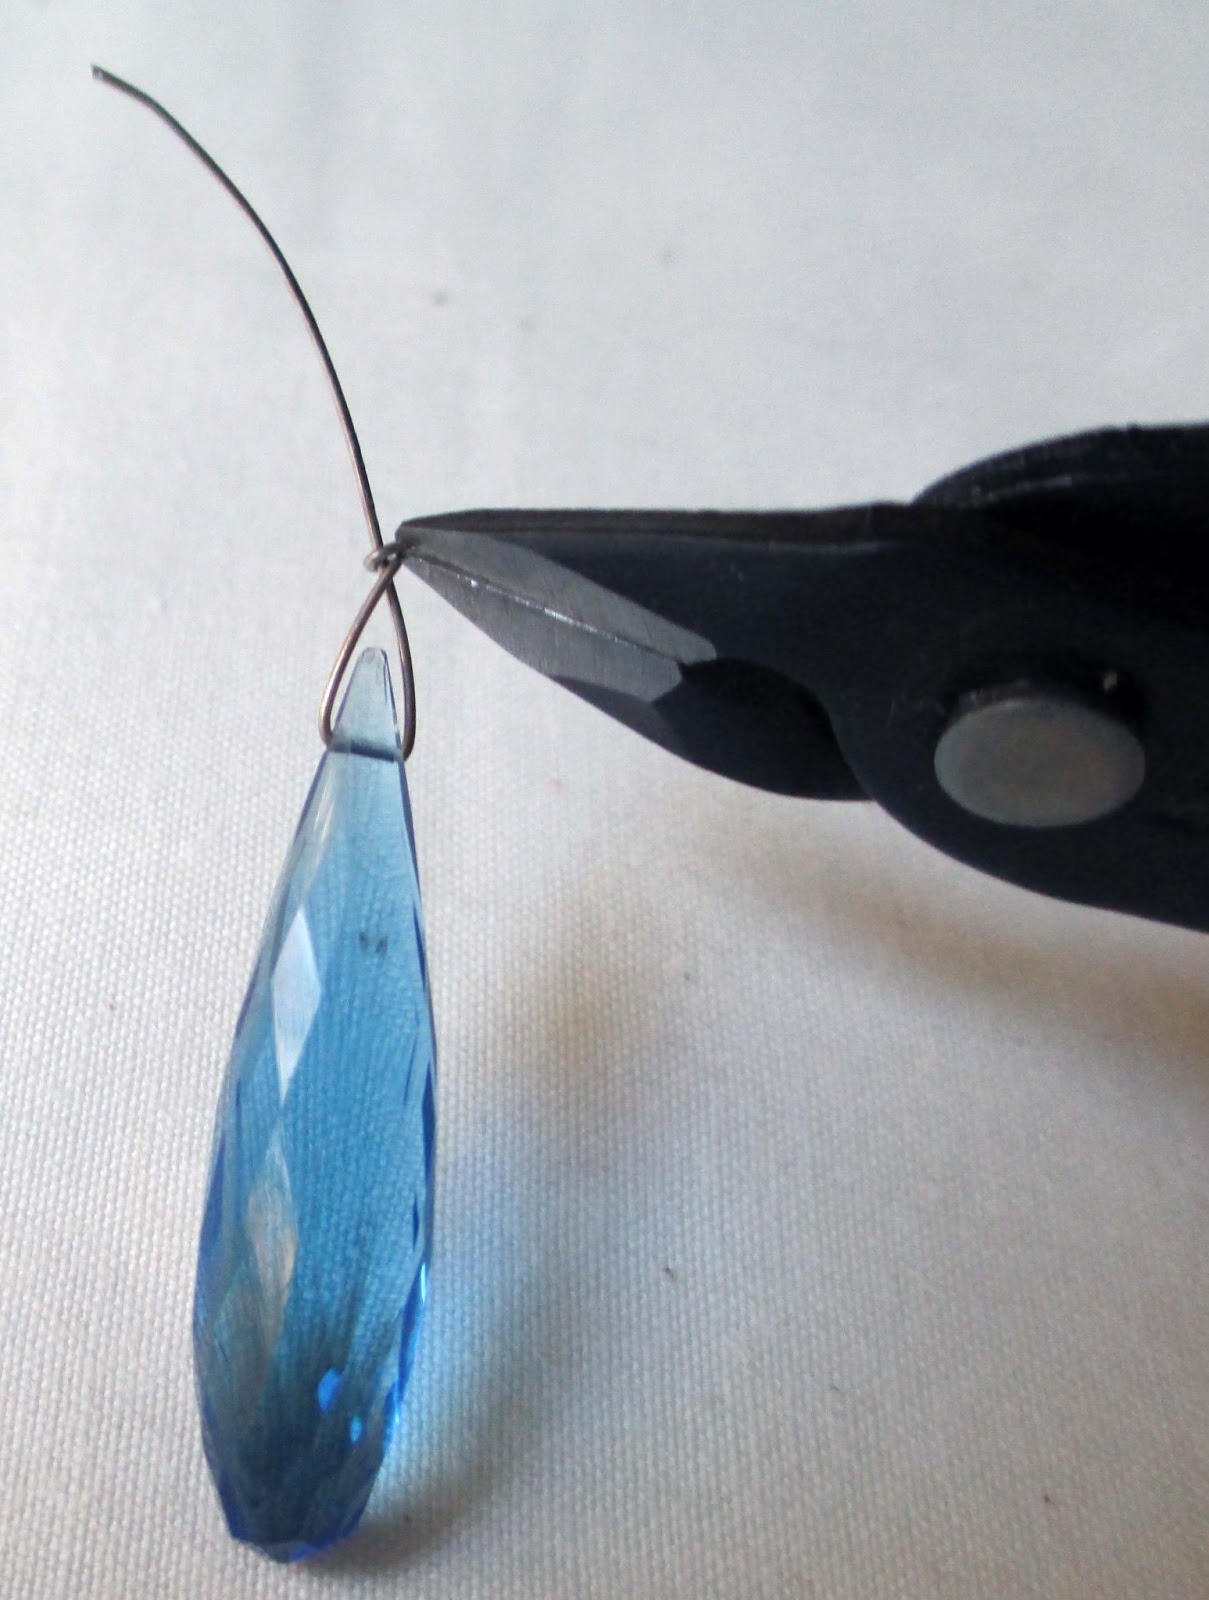
Twist the wire to form a little
triangle over the briolette.

Grip the triangle with your
pliers.

Twist the shorter end of the wire
over the longer end one full time.

A closer look...

Cut the shorter tail off as
closely as possible.
Your wire should now look like
this.

With your round nose pliers,
create a little dip in the wire, close to the briolette.

It should like this.

Slide the bottom end of the fleur
de lis connector onto the dip.

Form a loop and wrap the wire
around one full time.

A closer look...

Cut the tail of the wire off as
closely as possible.

With your flat nose pliers, open
the loop on your ear wires

and slide top of the fleur de lis
connector into it.

Squeeze closed with flat nosed
pliers.

Voila – your finished earring!

Repeat the process and you will
soon have a pair!

As always, I hope this tutorial has been fun and informative, and welcome your feedback or suggestions! I'll leave you with a sneak peek at my latest necklace designs, coming to The French Circus tomorrow! Enjoy the rest of your weekend, mes amis! :)


Thanks for sharing the tutorial.
ReplyDeleteI really need to practice my wire wrapping to make it a little more neater.
Hope you are enjoying the weekend.
Great tutorial Robyn! I should try it this way, I do it differently, but this looks easier! Thanks!
ReplyDeleteHi Robyn!
ReplyDeleteLove the tutorial and the newsletter! Hope you're ready for our 5 mile treck!
Danette :)